


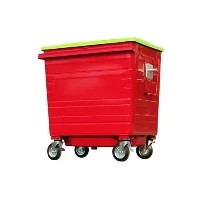
As a supplier of 770L Galvanized Bins, I understand that these bins are durable and long - lasting, but like any product, they can sometimes get damaged. Whether it's due to rough handling, exposure to harsh environmental conditions, or normal wear and tear, knowing how to repair them can save you time and money. In this blog, I'll share some practical tips on how to repair 770L Galvanized Bins when they are damaged.


1. Inspection of the Damage
The first step in repairing a 770L Galvanized Bin is to thoroughly inspect the damage. This will help you determine the best course of action.
- Minor Scratches and Surface Rust: Minor scratches on the galvanized surface are common. These can expose the underlying metal to the air, leading to surface rust. Use a wire brush to gently remove the rust from the scratched area. After that, clean the area with a mild detergent and water to remove any debris. Once dry, you can apply a zinc - rich paint to the scratched area. Zinc - rich paints can mimic the protective properties of the galvanized coating, preventing further rusting.
- Dents: Dents can occur if the bin is hit by a heavy object. For small dents, you can try using a rubber mallet. Place a block of wood on the inside of the bin, behind the dent. Then, gently tap the outside of the dent with the rubber mallet. The block of wood will help distribute the force evenly and gradually push the dent out. For larger dents, it may be more difficult to repair them yourself. You might need to consult a professional or consider replacing the damaged panel if possible.
- Holes: Holes in the bin can be caused by sharp objects or corrosion over time. Small holes can be patched. First, clean the area around the hole with a degreaser to ensure good adhesion of the patch. Then, cut a piece of galvanized sheet metal that is slightly larger than the hole. Use a metal adhesive or weld the patch over the hole. If you choose to weld, make sure you have the proper equipment and skills, as welding requires safety precautions.
2. Tools and Materials Needed
Before you start the repair process, gather the necessary tools and materials:
- Tools: Wire brush, rubber mallet, block of wood, screwdriver, welding equipment (if needed), drill, and measuring tape.
- Materials: Zinc - rich paint, galvanized sheet metal, metal adhesive, degreaser, and safety gear such as gloves and goggles.
3. Step - by - Step Repair Process
For Surface Rust and Scratches
- Prepare the Area: Use a wire brush to remove any loose rust or debris from the scratched area. Make sure to brush in the direction of the grain of the galvanized surface to avoid further damage.
- Clean the Area: Mix a mild detergent with water and use a sponge or cloth to clean the area. Rinse it thoroughly with clean water and let it dry completely.
- Apply Primer (Optional): If the damage is more severe, you can apply a metal primer to the area. This will help the paint adhere better and provide an extra layer of protection.
- Apply Zinc - Rich Paint: Shake the zinc - rich paint well before use. Use a paintbrush or a spray gun to apply the paint evenly over the scratched area. Apply multiple thin coats, allowing each coat to dry according to the manufacturer's instructions.
For Dents
- Locate the Dent: Mark the location of the dent on the outside of the bin. This will help you position the block of wood correctly on the inside.
- Place the Block of Wood: Insert the block of wood on the inside of the bin, directly behind the dent. Make sure it is firmly in place.
- Tap the Dent: Gently tap the outside of the dent with a rubber mallet. Start from the edges of the dent and work your way towards the center. Check the progress regularly to avoid over - hammering.
For Holes
- Clean the Area: Use a degreaser to clean the area around the hole. This will remove any oil, dirt, or grease that could prevent the patch from adhering properly.
- Cut the Patch: Measure the size of the hole and cut a piece of galvanized sheet metal that is at least half an inch larger on all sides than the hole.
- Attach the Patch: If using a metal adhesive, apply the adhesive to the back of the patch and press it firmly over the hole. Hold it in place for a few minutes until the adhesive starts to set. If welding, carefully weld the edges of the patch to the bin. Make sure to weld evenly to avoid weak spots.
4. After - Repair Maintenance
After repairing the 770L Galvanized Bin, it's important to maintain it properly to prevent future damage:
- Regular Cleaning: Clean the bin regularly with a mild detergent and water. This will remove any dirt, debris, or chemical residues that could cause corrosion.
- Avoid Harsh Chemicals: Do not use harsh chemicals or abrasive cleaners on the bin, as they can damage the galvanized coating.
- Proper Storage: Store the bin in a dry, sheltered area when not in use. This will protect it from extreme weather conditions.
5. When to Replace Instead of Repair
In some cases, it may be more cost - effective and practical to replace the bin rather than repair it:
- Severe Structural Damage: If the bin has multiple large dents, extensive rust, or holes that are too large to patch, it may be time to replace it.
- Old Age: Galvanized bins have a lifespan. If the bin is very old and has been repaired multiple times, it may be more reliable to get a new one.
6. Our Product Offerings
As a supplier, we offer high - quality 770L Galvanized Bins. You can explore our 770L Industrial Waste Bin and 770L Wheels Garbage Bin on our website. Our bins are made from high - grade galvanized steel, ensuring durability and long - term performance.
If you are interested in purchasing our 770L Galvanized Bins or have any questions about the repair process, please feel free to contact us. We are always ready to assist you with your waste management needs. Whether you need a single bin or a large quantity for your business, we can provide you with the best solutions.
References
- "Galvanized Steel Handbook" - A comprehensive guide on the properties and maintenance of galvanized steel.
- Industry standards and guidelines for waste bin manufacturing and repair.